Laser Drilling vs Mechanical Drilling for HDI PCB
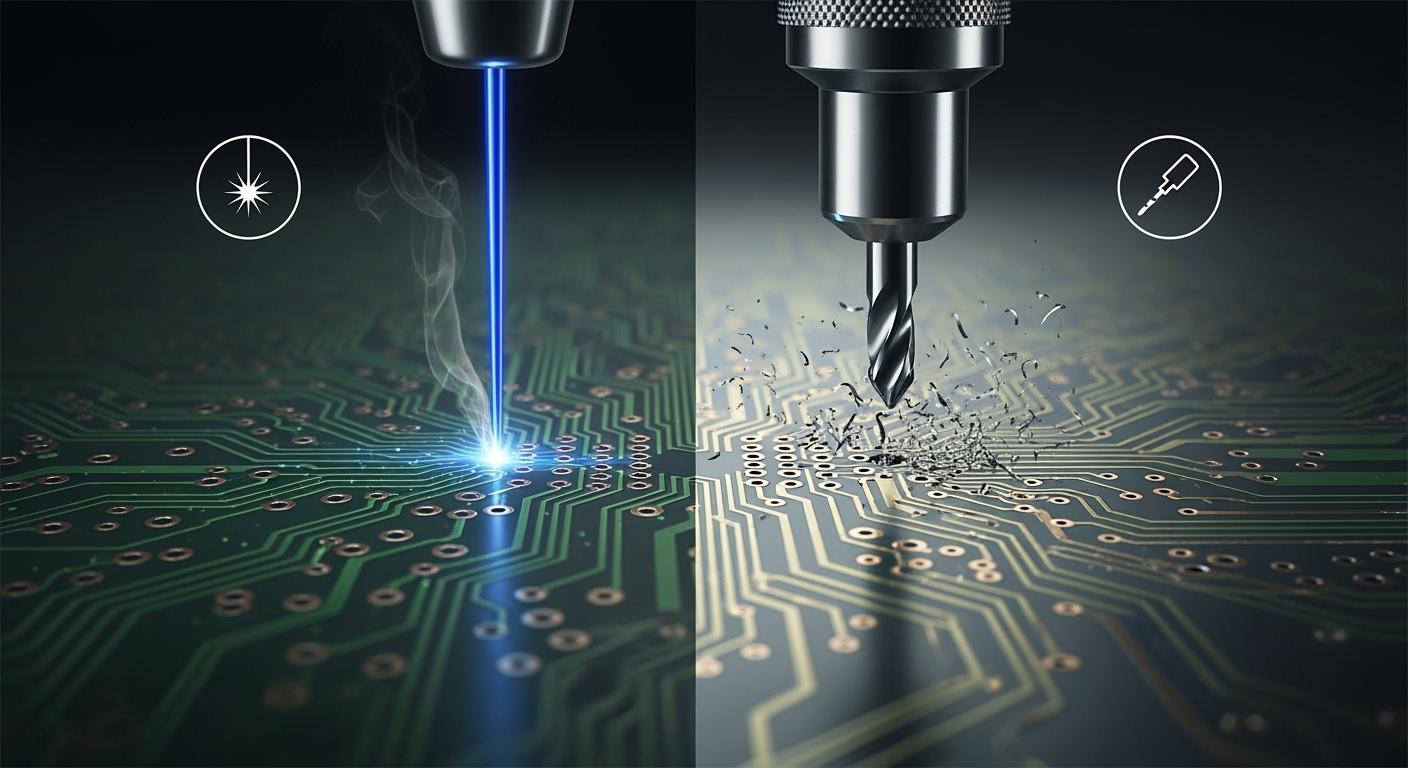
You want your HDI pcb to work well. Laser drilling gives very good accuracy. It is great for small holes and tight spots. Mechanical drilling is good for bigger holes. Picking the right method changes cost and reliability. Look at the table below to compare:
Drilling Method | Cost Impact | Reliability Impact |
|---|---|---|
Laser Drilling | Costs more because it is very accurate | Needed for high-density interconnects |
Stacked Microvias | Costs more because of alignment and filling | More complex, may fail more often |
Staggered Microvias | Costs less because it is easier to make | Easier to make, may fail less often |
Think about what you want for your project. Also, think about the holes you need before you choose.
Key Takeaways
Laser drilling is best for making very small and exact holes. It works well for microvias in high-density interconnect designs.
Mechanical drilling costs less when you need bigger holes or thicker boards. It is a good choice for normal uses.
Think about what your project needs, like hole size and board thickness. This helps you pick the best drilling method.
Laser drilling is much faster and can make thousands of holes each second. This is great if you need to make many boards.
Always check your tools and clean your boards after drilling. This helps you get good results and stops common mistakes.
Drilling Methods for PCB
Laser Drilling Overview
Laser drilling is used when you need tiny, exact holes in your PCB. A focused laser beam burns away the material to make neat, accurate holes. The laser does not touch the board, so there is no damage from shaking or rubbing. You can make microvias as small as 0.025 mm, which is needed for high-density interconnect designs.
Laser drilling is best for thin boards, usually under 0.8 mm thick.
It makes smooth hole walls, which helps with plating and lowers defects.
You can drill thousands of holes each second, so it is fast for big jobs.
This method works on many materials without hurting them.
There is not much debris, so you do not need to clean up a lot.
Laser drilling is great for microvias, stacked vias, and staggered vias. It gives you high accuracy and speed, but it can cost more and may not work well for deep holes or shiny materials.
Mechanical Drilling Overview
Mechanical drilling is used for bigger holes in your PCB. It uses a spinning drill bit to cut through the board. The drill bit touches the board, which can make heat and rubbing. You have to watch out for tool wear and possible damage, especially with fragile boards.
Mechanical drilling is best for holes 0.15 mm or bigger.
It works well for thick boards, like those that are 2.4 mm thick.
You get good value for normal holes.
The holes may have rough walls, so you often need extra cleaning.
Debris can pile up, so you must clear it to stop contamination.
Mechanical drilling is common for through-holes and bigger vias. You can control how deep you drill, but you cannot make holes as tiny or as exact as with laser drilling.
Drilling Method | Hole Size Range | Board Thickness | Application | Key Features |
|---|---|---|---|---|
Mechanical Drilling | ≥0.15 mm | Thicker boards (2.4 mm) | Larger holes | Depth control, cost-effective |
Laser Drilling | As small as 0.025 mm | Thin boards (<0.8 mm) | Microvias | Speed and precision |
Tip: Pick laser drilling for microvias and tiny features. Use mechanical drilling for normal holes and thick boards.
Laser Drilling vs Mechanical Drilling Comparison
Precision and Hole Size
When you make high-performance pcbs, you need to be exact. Laser drilling can make very tiny holes with close measurements. These holes can be as small as 0.1 mm or even smaller. This is important for microvias in HDI pcb designs. Mechanical drilling is better for bigger holes, starting at 0.15 mm. It cannot make holes as small as laser drilling. Drill bits have size limits and can break.
Here is a table to help you compare:
Drilling Method | Achievable Hole Diameter | Positional Accuracy |
|---|---|---|
Laser Drilling | Much smaller holes | Not as deep, can taper |
Mechanical Drilling | Bigger holes | Good quality, no taper |
Laser drilling puts holes right where you want them. The holes are very close to the right size, within ±0.002 inches (0.0508 mm). Mechanical drilling gives about ±0.05 mm for small holes. If you need tiny, exact holes, laser drilling is best. For normal holes, mechanical drilling works well and makes smooth edges.
Cost and Efficiency
You want to save money and work fast. Laser drilling costs more at first because the machines are pricey. But you save money later. You do not need to change tools often. Laser drilling can make thousands of holes each minute. This is good for boards with lots of microvias. You also lower the chance of hurting your pcb, so you spend less fixing mistakes.
Mechanical drilling is cheaper for simple boards with big holes. You pay less at the start, but you must buy new drill bits a lot. This makes it cost more over time, especially for hard jobs. If you work with high-density or fast boards, laser drilling saves more money in the end.
Laser drilling is good for boards with many holes.
Mechanical drilling is cheaper for simple pcbs.
Laser drilling means fewer tool changes and less board damage.
Reliability and Quality
You want your pcb to work well and last long. How good the holes are depends on the drilling method. Mechanical drilling makes nice holes with smooth edges and no taper. You get the same results, even with lots of holes. Laser drilling can leave burnt edges or slanted holes, especially if the hole is deep. This can make it harder to plate and may cause cracks.
Still, laser drilling is needed for microvias and tight spots. It gives you high accuracy and speed, which helps signals and performance. For bigger holes, mechanical drilling is more reliable and gives better quality. For microvias and small parts, laser drilling is the best pick.
Drilling Method | Hole Wall Finish | Aspect Ratio Impact |
|---|---|---|
Mechanical Drilling | Smooth holes with clean edges | Same quality even with many holes |
Laser Drilling | May leave burnt edges and slant | Deep holes are harder to plate and may crack |
Note: For fast and dense boards, always check the hole depth and wall finish to make sure your board is strong.
Throughput and Speed
Speed is important when you want your pcb done fast. Laser drilling can make up to 9,000 vias every second. This is great for HDI boards with lots of microvias. You get your boards quicker. Laser drilling does not touch the board, so tools do not wear out.
Mechanical drilling is faster for big holes and easy boards. You need to change drill bits a lot, which slows things down for small holes. For hard boards with many microvias, laser drilling is the fastest and most efficient.
Method | Advantages | Impact on Lead Time |
|---|---|---|
Laser Drilling | Very exact, fast, great for microvias, tight fit, no contact | Makes HDI PCBs much faster |
Mechanical Drilling | Cheaper for big holes, needs extra cleaning | Can slow down making the board |
If you want exact holes and fast work for your high-performance pcbs, laser drilling is best for microvias and small parts. For normal holes and easy boards, mechanical drilling gives good value and works well.
Microvias for HDI Designs
Laser Drilling for Microvias
You need microvias for hdi designs if you want small, powerful devices. Laser drilling is the best way to make these tiny holes. This method can make laser microvia holes as small as 0.004 inches. The depth and width of the hole are the same. This is important for high-density boards. Laser drilling lets you put each microvia in the right spot. The holes are clean and flat at the bottom. This helps with strong plating and good electrical flow.
Laser microvia technology lets you build high-density layers without hurting the board. The laser burns away the material. You do not get cracks or rough edges. Microvias let you fit more parts in a small space. That is why smartwatches and hearing aids use high-density interconnect PCBs. Laser drilling is also fast. This helps when you need to make many boards quickly.
Here is a table of industry standards for microvias:
Specification Type | Minimum Requirement |
|---|---|
Plating Thickness | 0.7 mil (internal), 1.0 mil (external) |
Hole Wall Quality | No voids >5% of hole wall area |
Aspect Ratio | 1:1 (depth ≤ diameter) |
Minimum Diameter | 0.004 inches (4 mils) |
Microvia-to-Pad Spacing | 0.003 inches (0.0762mm) |
Microvia-to-Microvia Spacing | 0.005 inches (0.127mm) |
Tip: Use laser microvia for high-density, high-speed, and high-volume jobs. You get better reliability and performance.
Mechanical Drilling for Microvias
Mechanical drilling does not work well for microvias in hdi. The drill bits are too big for these tiny holes. You cannot control the depth as well. You might hurt the inside layers. The holes can have rough walls or cracks from shaking and heat. You also cannot make flat-bottom holes. This makes plating harder and less reliable.
If you try mechanical drilling for high-density microvias, you will see more mistakes and lower quality. The process is slow and not good for making lots of boards. You should only use mechanical drilling for bigger holes, not for microvias in high-density interconnect designs.
Here is a quick comparison:
Feature | Traditional Vias | Microvias |
|---|---|---|
Diameter | 150µm–500µm | ≤150µm (6 mils) |
Aspect Ratio | >1:1 | ≤1:1 |
Reliability | Lower in thin stacks | High |
Space Efficiency | Limited | Very high |
Parasitic Effects | More | Less |
Microvias can make your board up to 60% smaller.
You can put more parts close together.
Microvias help signal quality and make boards last longer.
If you want the best results for high-density interconnect, always pick laser drilling for microvias.
Application Suitability
Through-Hole Applications
Through-hole applications are common in multilayer boards. Mechanical drilling is best for these holes. It gives good accuracy for bigger vias and plated holes. This way costs less for each hole than laser drilling. Machines with many drill heads can make lots of holes at once. This helps you finish big jobs faster.
Here is a table that shows why mechanical drilling is good for through-hole needs:
Feature | Mechanical Drilling |
|---|---|
Precision | Good for through-hole vias and bigger plated vias |
Cost-Effectiveness | Cheaper per hole than laser drilling |
High Throughput | Many heads drill at the same time for big jobs |
Challenges | Drill can move in thick boards, but pilot holes or strong tools help |
Pick mechanical drilling for holes 0.15 mm or bigger.
This method lets you control depth and saves money for multilayer pcb jobs.
Blind and Buried Vias
Blind and buried vias connect layers inside your board. They do not go all the way through. Blind vias link an outside layer to an inside layer. Buried vias connect only inside layers and cannot be seen from outside. These vias help you make high-density boards.
Laser drilling gives you the control needed for these special holes. You can make very small holes with tight size limits. The laser can drill holes as small as 2 mil. You can also control how deep the hole goes, which is important for microvias. Most makers set a max depth of 10 mil for microvias with a 1:1 aspect ratio. You must use the right prepreg thickness for laser drilling. You can also pick different finishes, like filling and making the surface flat.
Tip: Use laser drilling for blind and buried vias in HDI designs. You get better accuracy and more ways to design your board.
Microvias in HDI PCB
Microvias help you build small and powerful devices. Laser drilling is the best way to make these tiny holes. You can drill up to 9,000 microvias every second. This fast speed helps you finish big jobs quickly. Laser drilling does not touch the board, so tools do not wear out and there is no heat damage.
Experts say laser drilling is best for microvias. You get very accurate and clean holes. Mechanical drilling cannot do this for small vias. It works better for bigger holes and thick boards, but it is slower and less exact for microvias.
Here is a quick comparison:
Method | Advantages | Disadvantages |
|---|---|---|
Laser Drilling | Very accurate, fast, works with many materials, does not touch the board | Costs more to set up |
Mechanical Drilling | Good for bigger holes, faster for thick boards | Makes heat, needs new tools often, not as exact for small holes |
If you want the best results for your HDI pcb, pick laser drilling for microvias.
Decision Guide for PCB Drilling
Selection Matrix
A selection matrix helps you pick the right drilling method. The table below shows which method fits different needs:
Project Need | Laser Drilling | Mechanical Drilling |
|---|---|---|
Microvias | ✅ Best choice | ❌ Not suitable |
Large Holes | ❌ Not efficient | ✅ Best choice |
High Speed | ✅ Up to 9,000 vias/sec | ❌ Slower for small holes |
Thick Boards | ❌ Limited | ✅ Works well |
Cost Savings | ❌ Higher setup cost | ✅ Lower for big holes |
Clean Hole Walls | ✅ Smooth for small | ✅ Smooth for large |
Tip: Laser drilling is best if you need lots of small holes. Mechanical drilling is better for bigger holes and thick boards.
Factors to Consider
Think about a few things before picking a drilling method:
Material compatibility: Check if the method works with your board.
Precision: Decide how exact you want the holes.
Hole size: Use laser drilling for tiny holes. Use mechanical drilling for bigger holes.
Design complexity: Complex designs may need laser drilling for accuracy.
Cost considerations: Look at setup costs and savings over time.
Laser drilling makes microvias very quickly. It can drill up to 9,000 vias each second. Mechanical drilling is better for big holes but needs more tool changes for small holes. Think about what your project needs before you choose.
Expert Tips and Pitfalls
Common Mistakes
You may face problems if you do not follow the right steps during drilling. Many people make the same mistakes when working with HDI PCBs. You can avoid these issues if you know what to look for. Here is a table that shows the most common mistakes and how you can fix them:
Common Mistake | Solution |
|---|---|
Poor hole shapes | Optimize laser settings and keep the drill pad flat to stop vibrations. |
Misregistration | Measure core expansion and use precise machines for accurate alignment. |
Residues | Use better cleaning methods after drilling to remove copper and resin. |
Tip: Always check your equipment before you start. Clean your board after drilling to get rid of any leftover material.
Best Practices
You can get better results if you follow expert advice. Here are some best practices that help you make strong and reliable HDI PCBs:
Use advanced machines. Pick laser drilling systems and automated optical inspection tools. These help you make tiny holes and check your work with high accuracy.
Automate your process. Set up machines to handle materials and place parts. This reduces mistakes and keeps your boards the same every time.
Watch your process all the time. Check important things like temperature during soldering. This helps you find problems early and keep your boards at a high standard.
Note: When you use the best tools and keep an eye on your process, you make fewer mistakes and get better PCBs.
You can avoid many problems if you follow these tips. Always use the right equipment and keep your process under control. This will help you make high-quality HDI PCBs every time.
You want your HDI PCB to work really well. Laser drilling is very accurate and fast for microvias in small devices. Mechanical drilling is good for bigger holes and thick boards in regular designs. Look at the table below to see which method is best for you:
Drilling Method | Key Features | Applications |
|---|---|---|
Mechanical Drilling | Saves money for big holes and thick boards | Used in standard and industrial PCBs |
Laser Drilling | Accurate and quick for microvias | Used in HDI, 5G, and flexible PCBs |
Think about what your project needs. Ask PCB makers to help you pick the right drilling method.
FAQ
What is the smallest hole you can make with laser drilling?
You can make holes as small as 0.025 mm with laser drilling. This size works well for microvias in HDI PCBs.
Can you use mechanical drilling for microvias?
Mechanical drilling cannot make microvias. Drill bits are too large. You should use laser drilling for tiny holes.
Does laser drilling damage the PCB?
Laser drilling does not touch the board. You avoid tool wear and reduce the risk of cracks or rough edges.
Which method is faster for high-volume jobs?
Laser drilling can drill thousands of holes each second. You finish high-density boards much faster than with mechanical drilling.
How do you choose the right drilling method?
You should look at hole size, board thickness, and project needs. Laser drilling fits microvias. Mechanical drilling works for bigger holes.
See Also
Techniques for Achieving Flat Electroplating in HDI PCB Holes
Understanding Back Drilling in HDI PCB Production
The Process of Laser Via Filling in HDI PCBs