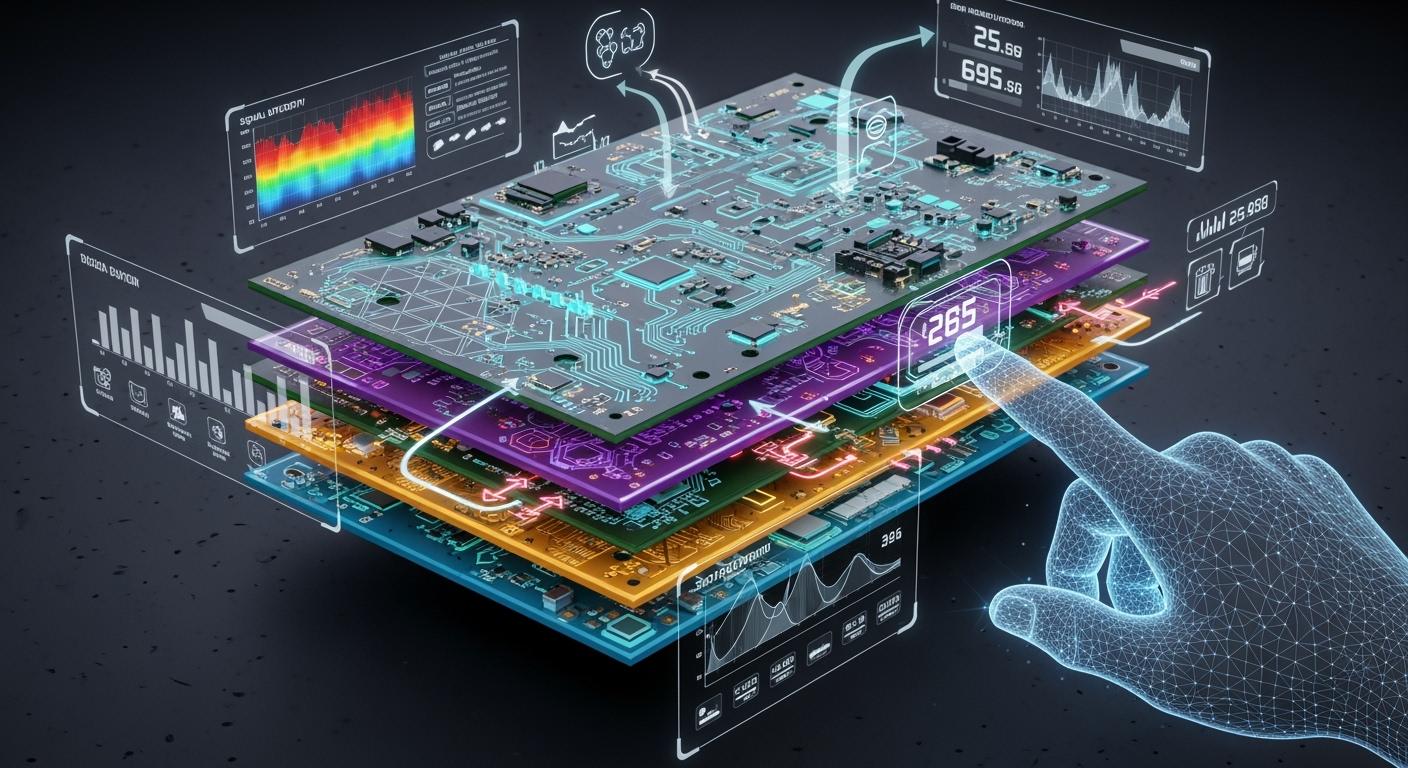
How to Optimize Your 20-Layer PCB Stack-up for High-Speed Performance
You get high-speed performance in a 20-layer pcb by working on pcb stack-up design. The right stack-up lowers EMI, helps signal integrity, and controls heat. You need to put signal, power, and ground layers in your multi-layer pcb stack-up. Choosing materials, controlling impedance, and grounding power are important in pcb design. For the best stack-up, use the 3W rule, guard traces, and thermal vias. The table below lists common ways to make high-speed circuits and high-performance devices work better in a 20-layer pcb stack-up.
Technique | Description |
|---|---|
3W Rule | Keep high-speed signal traces at least 3 times the trace width apart to lower field coupling by 70%. |
Guard Traces | Put grounded guard traces next to sensitive signal lines. |
Thermal Vias | Place arrays under high-power chips to move heat through copper layers. |
Key Takeaways
Plan your 20-layer PCB stack-up with care. This helps signals stay strong and lowers EMI. Keep fast signals close to ground planes.
Use the 3W rule to space fast traces apart. This lowers field coupling and cuts down on crosstalk. It helps signals stay clear.
Pick low-loss dielectric materials for your PCB. These materials keep signals strong and stop energy from being wasted.
Keep solid power and ground planes in your stack-up. This helps power move well and lowers noise in fast circuits.
Talk to your fabricator early when you design. Working together helps stop problems and makes sure your stack-up will work.
Why 20-Layer PCB Stack-Up Design Matters
Signal Integrity and EMI
When you use a 20-layer pcb, stack-up is very important. The way you put the layers together changes how signals move. If you want good signal integrity, you must plan early. High-speed pcb design needs you to control noise and block interference. The table below shows what experts say about stack-up and signal integrity.
Source | Key Findings |
|---|---|
The Impact of Layer Stackup on EMI Performance in Multi Layer PCB Design | A well-planned multi-layer PCB stackup can significantly improve EMI shielding performance, reduce noise, and ensure signal integrity. |
The Impact of Stackup Design on Signal Integrity | Signal integrity must be considered from the start of the design concept, influencing the entire design process. |
Design PCBs for EMI, part 2: Basic stack-up | The stackup affects signal travel, power distribution, and EMI shielding effectiveness. |
You should keep high-speed signals close to ground planes. This helps lower EMI and keeps signals strong. You also need to keep high-speed signals away from noisy power layers. Good pcb design uses the right stack-up to protect signals.
Thermal and Space Efficiency
A 20-layer pcb gives you more space for signals and power. You can add more traces and planes in the stack-up. This helps you control heat and keep the board flat. If your stack-up is not balanced, you can have big problems. Here are some risks with poor stack-up in a 20-layer pcb:
Warpage: If the stack-up is not balanced, the pcb can bend or twist.
Impedance Issues: Wrong materials or copper can hurt impedance and signals.
Delays: Picking the wrong materials can slow down making the pcb.
You need to work on your stack-up to make it better. This keeps your 20-layer pcb strong and ready for fast signals. Good stack-up design helps you avoid mistakes and keeps signals strong in every layer.
20-Layer PCB Stack-Up Design Essentials
Layer Arrangement and Pairing
When you start designing a 20-layer pcb, you need to think about how you arrange the layers. The way you put each layer in place changes how signals move. If you keep signal layers close to ground planes, signals stay strong and impedance is lower. Try not to put two signal layers next to each other. This helps stop EMI and keeps high-speed signals clear.
Here are some easy strategies for arranging layers in a 20-layer pcb:
Put signal layers next to ground planes. This makes signals stronger and helps them move fast.
Do not put two signal layers side by side. This stops EMI and keeps signals from mixing.
Use ground planes that are not broken for microstrip setups. This keeps the electromagnetic field inside and protects fast signals.
Put power planes close to ground planes, like 8 mils apart. This makes a strong power network and lowers EMI when signals change.
Tip: If you arrange layers the right way in your multi-layer pcb, you can stop crosstalk and keep your 20-layer pcb steady when signals move fast.
Signal, Power, and Ground Layers
You have to plan where signal, power, and ground layers go in a 20-layer pcb. Good pcb design uses all three types of layers to save space and help fast signals move well. Keep high-speed signals close to ground planes. This helps control impedance and keeps signals strong. Use ground planes that are not broken to shield signals and help fast signal movement.
A normal 20-layer pcb stack-up might look like this:
Layer Type | Purpose |
|---|---|
Signal Layer | Carries high-speed signals |
Ground Plane | Shields signals, lowers EMI |
Power Plane | Distributes power evenly |
Signal Layer | Routes high-speed signal paths |
Ground Plane | Provides return path for signals |
You should keep repeating this pattern in your pcb stack-up. This keeps the stack-up even and stops the board from bending. You also get better heat control and use space well. Keep high-speed signals away from noisy power layers. This keeps signals safe and helps them move fast.
Minimizing Crosstalk
Crosstalk can make signals weak in a 20-layer pcb. You need smart ways to stop crosstalk in your pcb stack-up. Ground planes work like shields and block bad signals. You should make traces farther apart by using the 3W rule. Leave at least three times the trace width between fast traces. This lowers field coupling and keeps signals clean.
You can also put signals on different layers. This stops them from running side by side for a long time and cuts down crosstalk. Make sure signal layers are the same on both sides of the stack-up. This keeps things balanced and helps fast signals move well.
Use ground planes to shield against crosstalk.
Make traces farther apart with the 3W rule.
Put signals on different layers to stop parallel runs.
Keep signal layers the same on both sides for balance.
Note: Stopping crosstalk in your multi-layer pcb keeps signals strong and helps your pcb work well for fast jobs.
You need to use these ideas in your 20-layer pcb stack-up. This helps you use space well, move signals fast, and get your 20-layer pcb ready for high-speed work. Good pcb stack-up design gives you strong signals and makes every layer work well.
Material Selection for 20 Layer PCB
Low-Loss Dielectrics
You have to pick the right material for your 20-layer pcb. Low-loss dielectrics help signals move fast and stay strong. In high-speed pcb design, you want materials that do not waste much energy. This keeps your signals clear and stops mistakes. Many engineers use special materials for multi-layer pcb stack-up. These materials are good for high-density interconnect and high-speed signals.
Here is a table of common low-loss dielectric materials for 20 layer pcb stack-up:
Material | Applications | Key Features |
|---|---|---|
Rogers PCB | RF, telecommunications, automotive | Low loss, high-frequency performance |
Shengyi PCB | Automotive, industrial electronics | High temperature resistance, stable dielectric |
Taconic PCB | Aerospace, medical, high-speed communications | Excellent high-frequency stability |
Isola PCB | Consumer electronics, networking | High-speed signals, low loss |
Nelco PCB | 5G, aerospace, RF | Stable at high frequencies, strong mechanical properties |
Teflon PCB | Aerospace, medical, high-speed communication | Low dielectric loss, high-frequency stability |
You should choose a material with a low dielectric constant. This helps signals move faster in your pcb stack-up. Picking good materials makes your 20-layer pcb work better.
Prepreg and Core Choices
You also need to think about prepreg and core material for your 20-layer pcb. The prepreg sticks the layers together in your multi-layer pcb stack-up. The core gives strength and keeps the board flat. If you use the right prepreg and core, you get better signals and less noise.
You can switch power and ground planes with signal layers in your stack-up. This helps your 20 layer pcb work better and lowers EMI.
A good stack-up lowers noise and controls impedance. This is important for strong signals in your pcb design.
The dielectric constant of your material changes how fast signals move. Lower dielectric constant is better for high-speed pcb design.
You should always look at the datasheet for each material before you pick it for your pcb stack-up.
Balancing Cost and Performance
You want your 20-layer pcb to work well, but you also need to save money. Some materials cost more but give better results in your pcb design. For high-density interconnect and high-speed signals, you may need to spend more on materials. You can mix different materials in your multi-layer pcb stack-up to save money and still get good results.
Tip: Ask your pcb manufacturer about the best material for your 20 layer pcb. They can help you find the right balance between cost and performance for your pcb stack-up design.
You should always plan your stack-up and material choices early in your pcb design. This helps you avoid problems and gets your 20-layer pcb ready for high-speed work.
Impedance Control in 20 Layer PCB Stackup Design
Controlled Impedance Techniques
You need to control impedance in your 20-layer pcb to keep high-speed signals clean. In pcb stack-up design, you use controlled impedance traces to match the source and load. This matching stops reflections and keeps signal integrity strong. You should place ground planes close to signal layers in your multi-layer pcb stack-up. This setup helps you control the characteristic impedance and lowers noise. When you work on a 20 layer pcb, always check the stack-up for proper impedance matching. You can use simulation tools to test your pcb design before you build it. These steps help you avoid problems with high-speed signals and keep your stack-up ready for fast data.
Trace Width and Spacing
Trace width and spacing play a big role in impedance control for a 20-layer pcb. Wider traces lower impedance, while narrow traces raise it. The space between traces also changes the impedance. If you increase the spacing, the differential impedance goes up. If you decrease the spacing, it goes down. You must adjust these values in your multi-layer pcb stack-up to get the right impedance matching. Good pcb design uses these tricks to keep high-speed signals strong and stable. Always plan your trace width and spacing early in your stack-up. This planning helps you avoid crosstalk and keeps your 20 layer pcb working well.
Tip: Use a table to track your trace width, spacing, and target impedance for each layer in your pcb stack-up. This makes your 20-layer pcb easier to manage.
Reducing Signal Distortion
Signal distortion can hurt your 20-layer pcb. You need to use smart methods to keep signal integrity high in your multi-layer pcb stack-up. Here are some ways to reduce distortion:
Crosstalk reduction: Keep traces apart and use ground planes to block unwanted signals.
Return path optimization: Use short return loops and low-inductance paths. Place stitching vias near signal vias.
Controlled impedance: Match trace geometry and dielectric properties to the source and load. This matching cuts down reflections and keeps signals clear.
You should always check your stack-up for these features. Good impedance matching and careful pcb design help your 20 layer pcb handle high-speed signals without problems. When you focus on stack-up, you make your multi-layer pcb stack-up strong and ready for any job.
Power and Grounding in 20 Layer PCB
Power Plane Layering
You need to plan power planes carefully in your 20-layer pcb. Good power plane layering helps you get efficient power distribution across your multi-layer pcb stack-up. Place power planes close to ground planes in your stack-up. This setup forms a natural capacitor. It helps block high-frequency noise and keeps voltage stable. You should avoid splitting power planes in your pcb stack-up design. Use full, solid planes for power and ground. This method gives you low-impedance paths and makes your 20 layer pcb strong for high-speed signals.
A typical power and ground arrangement in a 20-layer pcb stack-up looks like this:
Layer | Type | Purpose |
|---|---|---|
2 | Ground Plane | Signal return, EMI shield |
3 | Power Plane | |
10 | Ground Plane | Signal return, EMI shield |
11 | Power Plane | Efficient power distribution |
This pattern helps you keep your multi-layer pcb stack-up balanced and reliable.
Ground Return Paths
You must pay attention to ground return paths in your 20 layer pcb. If you split the ground plane in your stack-up, you can cause problems. Return currents may take longer paths. This creates large loops that can radiate EMI. Noise can move from one section to another if high-speed signals cross a split ground plane. Impedance mismatches may also happen when signals cross splits. Always keep ground planes solid and place splits away from important signal paths in your pcb design.
Tip: Use stitching vias to connect ground planes in your multi-layer pcb stack-up. This keeps return paths short and lowers noise.
Noise Reduction
You can reduce noise in your 20-layer pcb by following a few key steps. Place power and ground planes close together in your stack-up. This design decouples high-frequency noise and helps with efficient power distribution. Keep ground planes next to signal layers in your pcb stack-up. This lowers loop inductance and protects high-speed signals. Use dedicated power and ground planes without unnecessary splits in your multi-layer pcb stack-up. Optimize layer spacing to boost capacitance and suppress noise. Try to minimize signal transitions between layers. Add stitching vias to further cut down EMI in your pcb design.
You can make your 20 layer pcb strong and quiet by using these noise reduction methods in your stack-up. Good power and grounding practices help your multi-layer pcb stack-up handle high-speed work without trouble.
EMI/EMC Mitigation in PCB Stack-Up Design
Shielding Strategies
You can lower EMI in your 20-layer pcb by using smart shielding strategies. Place ground planes next to signal layers in your stack-up. This shields high-speed signals and keeps noise away. In a multi-layer pcb stack-up, you should avoid gaps in ground planes. Solid planes work like shields and stop unwanted signals from spreading. You can also use guard traces near sensitive lines. These grounded traces act as barriers and help your pcb design block interference. When you plan your pcb stack-up design, always think about how each layer can help shield your signals.
Return Path Optimization
Return path optimization is key for strong EMI control in a 20-layer pcb. You need to give return currents a low-impedance path. This keeps your multi-layer pcb stack-up quiet and stable. If you use continuous reference planes in your stack-up, you stop gaps that force currents to take long paths. Long return paths create big loops that can radiate EMI. Solid ground and power planes under signal layers keep return paths short. This lowers ground bounce and makes your pcb design better for high-speed signals. When you build your 20 layer pcb, always check that your stack-up has unbroken planes for every signal layer.
Note: A well-planned stack-up with solid reference planes can cut down radiated emissions and keep your 20-layer pcb ready for fast, clean signals.
Reducing Emissions
You can reduce emissions in your 20-layer pcb by using a strong multi-layer pcb stack-up. Place signal layers next to planes and keep them tightly coupled. This setup traps radiation and keeps it inside the board. When you route high-speed signals on buried layers between planes, you stop them from leaking out. Use the 20H rule in your stack-up to lower emissions even more. This rule places the power plane inside the board and surrounds it with ground layers. It can cut emissions by up to 4.4 dB. A good pcb stack-up design with these tricks helps your 20 layer pcb meet tough EMI standards. Always plan your pcb design with emissions in mind, and use your stack-up to protect every signal.
Tip: A multi-layer pcb stack-up with solid planes and careful layer order can make your 20-layer pcb much quieter and more reliable for high-speed signals.
20 Layer PCB Manufacturing Process Tips
Collaboration with Fabricators
You should talk to your fabricator when you design a 20-layer pcb. Good communication helps you stop mistakes in your pcb stack-up. Share your plans early so your fabricator knows what you want. Ask if they can make your multi-layer pcb stack-up. Some shops cannot use certain materials or layer thickness. Check if your pcb manufacturing partner can build your stack-up and pcb design. Always ask for feedback on your 20 layer pcb before you finish. This helps you find problems early and saves time in pcb manufacturing.
Tip: Make a strong connection with your fabricator. This makes your 20-layer pcb project easier and helps you fix problems fast.
Manufacturability Considerations
You need to think about manufacturability when you plan your 20 layer pcb. A good pcb stack-up design makes pcb manufacturing simple and reliable. Here are some important points for your multi-layer pcb stack-up:
Layer stack management: Arrange signal, power, and ground layers for best performance and easy pcb manufacturing.
Design rule checks (DRC): Use automated tools to check your pcb design for errors before production.
3D visualization: Look at your stack-up in 3D to spot problems that may cause delays or defects.
Design for manufacturability (DFM): Make your stack-up simple and clear so your 20-layer pcb can be built without trouble.
If you follow these steps, your 20 layer pcb will be easier to make and less likely to have problems during pcb manufacturing.
Stack-Up Documentation
You need clear stack-up documentation for your 20-layer pcb. Good documentation shows every part of your pcb stack-up. List all layers in your multi-layer pcb stack-up, including signal, power, and ground layers. Add details about materials, thickness, and order. Use tables to make your stack-up easy to read. Share this documentation with your pcb manufacturing team. This helps everyone understand your pcb design and lowers mistakes in the 20 layer pcb manufacturing process.
Layer Number | Layer Type | Material | Thickness |
|---|---|---|---|
1 | Signal | FR4 | 0.1 mm |
2 | Ground | Copper | 0.035 mm |
... | ... | ... | ... |
20 | Signal | FR4 | 0.1 mm |
Note: Clear stack-up documentation helps your multi-layer pcb stack-up move smoothly from design to pcb manufacturing.
Common Mistakes in 20 Layer PCB Stack-Up
Making a 20-layer pcb is not easy. You need to watch out for mistakes in your stack-up. This helps your multi-layer pcb stack-up work well. Many engineers have the same problems with pcb stack-up design. You can learn from these mistakes and make your pcb design better.
Overlooking Signal Integrity
Signal integrity is very important in your 20-layer pcb. If you do not pay attention, you can have problems:
Signal distortion can make your data hard to read.
Reflections may cause errors in your signals.
Crosstalk can mix signals and add noise.
These problems can hurt your high-speed 20 layer pcb. You should route signal traces carefully and use controlled impedance. Always check your stack-up for signal integrity before finishing your pcb design. This step keeps your multi-layer pcb stack-up ready for fast data.
Poor Power/Ground Planning
Bad power and ground planning in your 20-layer pcb can cause trouble. You may get more electromagnetic interference and unstable power. Your signals can be weak and noisy. This makes your 20 layer pcb less reliable. You should use solid power and ground planes in your stack-up. Keep these planes close together in your multi-layer pcb stack-up. This setup helps your pcb design stay strong and quiet.
Ignoring Material Properties
You need to pick the right materials for your 20-layer pcb. If you ignore material properties, your stack-up can fail. Wrong materials can cause warping, bad impedance, or overheating. Always check the datasheet for each material in your multi-layer pcb stack-up. Match the material to your pcb design needs. This step keeps your 20 layer pcb safe and ready for high-speed work.
Here is a table of other common mistakes you should avoid in your pcb stack-up:
Mistake | Consequence | Solution |
|---|---|---|
Over-Complicated PCB Designs | More errors, higher costs | Simplify routing, limit layers |
Incorrect Component Placement | Grounding issues, more EMI | Separate sections, shorten traces |
Trace Width and Spacing Errors | Fabrication issues, overheating | Follow IPC standards, keep spacing |
Ignoring Design Rule Checks | Major layout errors | Always run DRC, set rules |
Landing Pattern Mistakes | Assembly failures | Verify footprints, follow guidelines |
Tip: Check your stack-up at every step. Careful planning helps you avoid mistakes and build a strong 20-layer pcb.
Tools for 20 Layer PCB Stack-Up Design
When you work on a 20-layer pcb, you need the right tools for pcb stack-up design. Good tools help you plan, check, and build your multi-layer pcb stack-up. You can avoid mistakes and make your 20 layer pcb strong for high-speed work. The right software and resources guide you through every step of pcb design.
Stack-Up Planning Software
You should start your 20-layer pcb project with stack-up planning software. These tools let you build and change your multi-layer pcb stack-up before you make the board. You can set up each layer, pick materials, and check thickness. Altium Designer’s layer stack manager helps you create and manage your stack-up with ease. Sierra Circuits Stackup Designer also gives you a way to build and validate your pcb stack-up. These programs help you see your 20 layer pcb before you build it, so you can fix problems early.
Tip: Use stack-up planning software to set up your multi-layer pcb stack-up and avoid costly changes later.
Simulation and Analysis Tools
Simulation and analysis tools help you test your 20-layer pcb before you make it. You can check signal paths, impedance, and power flow in your pcb stack-up. These tools let you find and fix problems in your multi-layer pcb stack-up. Here are some tools you can use:
Stackup Designer
Material Selector
Impedance Calculator
Via Impedance Calculator
Signal & Plane Layer Estimator
PDN Analyzer
Altium Designer also gives you strong simulation features for your 20 layer pcb. You can use these tools to make sure your pcb design meets high-speed needs.
Manufacturer Resources
You should use manufacturer resources when you plan your 20-layer pcb. Many manufacturers offer guides, standards, and stack-up tools for your pcb stack-up design. IPC-2221 and IPC-2226 give you design standards for your multi-layer pcb stack-up. Henry Ott’s EMC Engineering offers tips for high-speed pcb design. Always check with your manufacturer to see if your 20 layer pcb stack-up is easy to build. Use design rule checks and design for manufacturability features to keep your pcb stack-up strong and reliable.
Note: Manufacturer resources help you plan your stack-up, avoid errors, and make your 20-layer pcb ready for production.
You can optimize your 20-layer pcb by following smart pcb stack-up design steps. Arrange each stack-up layer with care in your multi-layer pcb stack-up. Choose the right materials for your 20-layer pcb. Control impedance and plan power and ground layers in your pcb design. Use simulation tools to check your pcb stack-up. Talk with manufacturers about your 20 layer pcb. Review every stack-up detail for high-speed work. Apply these strategies to your pcb design. For advanced stack-up tips, read more guides or ask an expert.
Tip: Careful stack-up planning makes your 20-layer pcb strong and ready for any challenge.
FAQ
What is the main benefit of a 20-layer PCB stack-up?
You get better signal integrity and lower EMI. A 20-layer stack-up lets you separate signals, power, and ground. This design helps your high-speed circuits work well.
How do you choose materials for high-speed 20-layer PCBs?
Pick materials with low dielectric loss. Check the datasheet for each material. Ask your manufacturer for advice. You want materials that keep signals strong and reduce heat.
Why should you avoid splitting ground planes?
Splitting ground planes can cause noise and EMI. Signals may not return on the shortest path. You should use solid ground planes to keep your board quiet and reliable.
What tools help with 20-layer PCB stack-up design?
You can use stack-up planning software like Altium Designer or Sierra Circuits Stackup Designer. Simulation tools help you check impedance and signal paths. Manufacturer resources give you design rules and tips.
See Also
A Guide to Common Stack-up Configurations for HDI PCBs
Top Materials for Designing High-Speed Printed Circuit Boards
Creating Efficient PCBs Tailored for LED Technology
Evaluating Costs and Benefits of Advanced HDI PCB Designs
Understanding High-Speed Printed Circuit Boards and Their Benefits